While I was building the grape stake PRS-22 for the winemaker, I'd glued up some 3/16" slices of grape stake into a panel for the control cavity and tremolo spring pocket covers. Nice clean panel, roughly 8"x10". Once the glue had dried, I noticed that the panel had an amazingly clear and loud ring and resonance when tapped. It was also incredibly light.
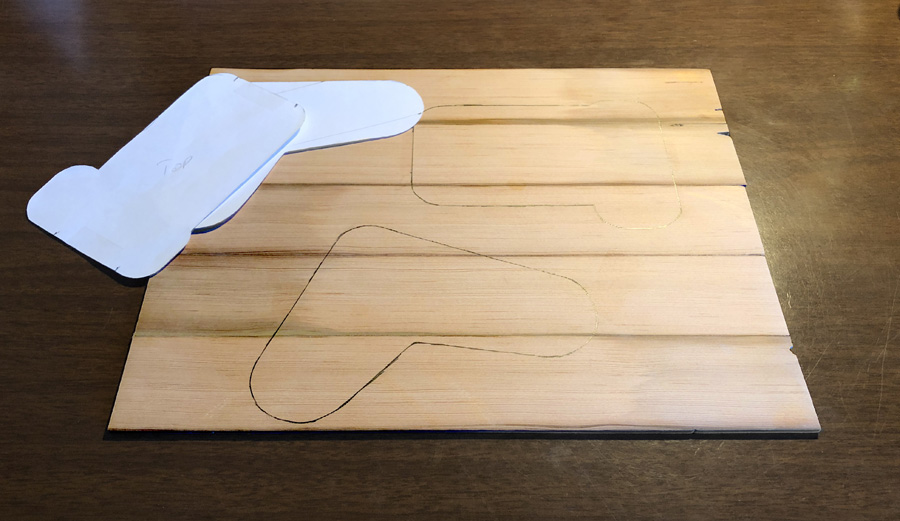
Somewhere between 50-70 years out in the Central Valley vineyards have done a number on this wood. Exposure to 6 months of blistering sun/6 months of wet soaked cycles have aged it, extremely.
This got my noodle thinking about old acoustic guitars, and how they
sound better the older they get, provided, of course, that they don't fall apart. As the wood ages, the moisture level equilibrium drops, and they get lighter, louder and warmer.
Well aged and soaked wood, the altered structure of the cellulose and lignens, the anti-fungal and anti-mold treatments, brought to mind recent articles on Cremona "golden age" violins. Seems that the "secret" to the sound of those instruments was seawater damaged wood, and then liberal treatments with anti-fungal solutions (primarily borax). Finishes with volatile carriers seemed to have been used rather than oil based finishes as well. Oil finishes tended to saturate the wood, creating dead sounding instruments. Happy accidents, not some secret method of construction.
The wood I'm using on this experimental parlor guitar has all the hallmarks of "happy accident" wood. The moisture level is much lower than newer air-dried wood, or even kiln dried wood.
However, wood in such a condition does present challenges:
It is brittle.
It is prone to splitting.
It cannot be steam bent into guitar sides (I tried, have burns to prove it).
It has nail and wire holes.
The last is purely cosmetic. Who knows, maybe someone wants a guitar with nail holes in it (not me, though).
The PLAN:
Build a parlor sized guitar, see how it sounds, play the crap out of it, see if it comes apart or breaks.
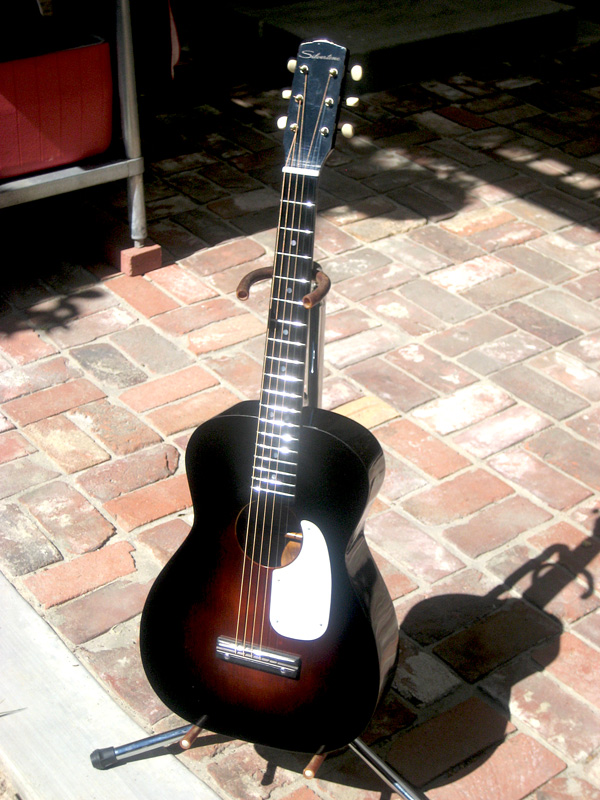
I'm basing most of this build on measurements taken from a few Harmony/Silvertone 604 Parlor Guitars. A 604 was my pop's very first guitar, and one of my first acoustic restorations. My wife rescued it from the dumpster when my folks were moving to Hawaii. It was a mess, shattered neck, crushed and split body, bent tuners, missing every single brace... It traveled for years with my pop on his various spy missions.
But it came out great. I rebraced it following a Martin X brace type pattern. It sounds very nice, for a birch plywood topped guitar.
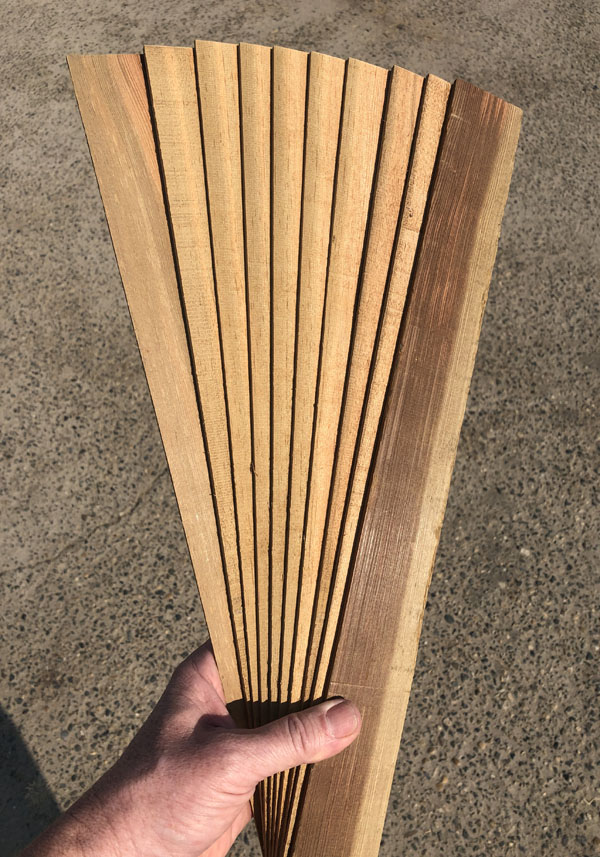
I picked out a few likely suspects from the stack of grape stakes. One with very, tight grain, 150+ rings per inch, and one with about 60 rings per inch. I didn't have the magic bandsaw then, so I sliced on the table saw. I used a thin kerf blade, but "thin kerf' on a table saw is still 4x thicker than the bandsaw's kerf. Regardless, one 20" section of stake was enough for each panel. I forgot to take pics before I had them trued up and glued, but they looked like this. These were sliced on the bandsaw, so there is one extra slice.
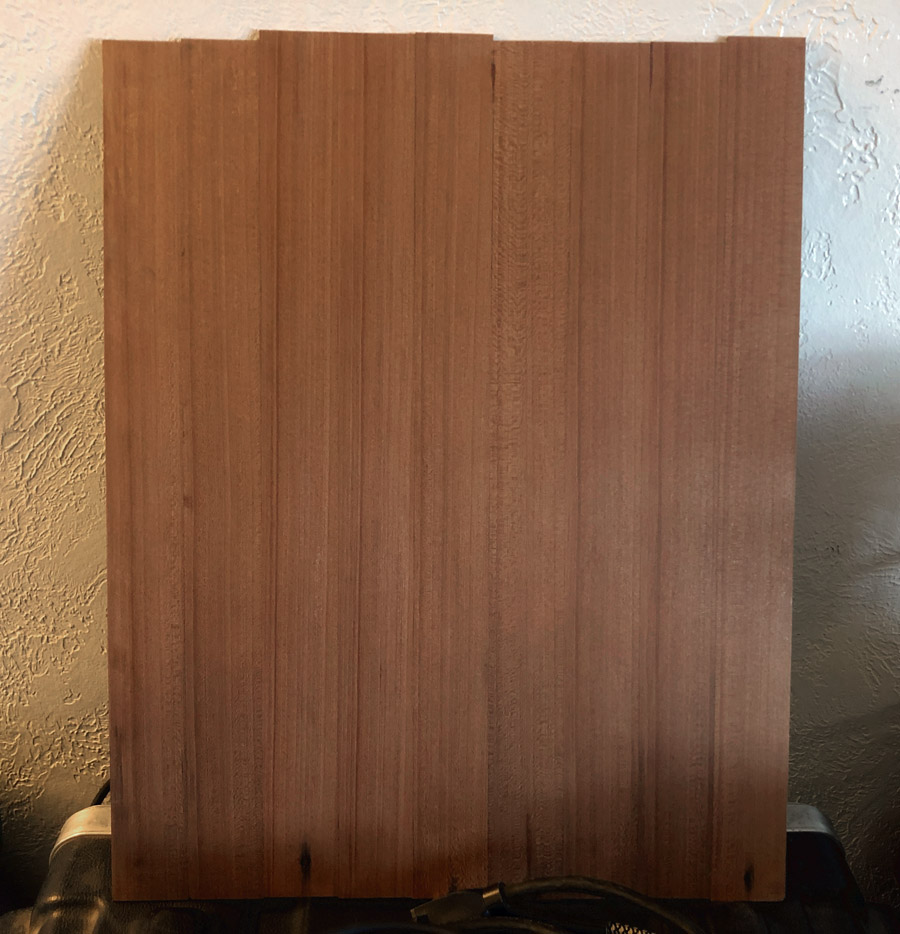
I glued up two panels, as I wasn't sure what ring count would make the best top. I very carefully trued up all the edges with a plane, then glued them with Titebond. I think I'll need to build a shooting box to more efficiently true the sides up on future guitar tops...
This is the first panel with the very tight rings. It was very ringy when tapped but obviously a lot heavier than the 60(ish) r.p.i. panel. Next time, I'll weigh the panels.
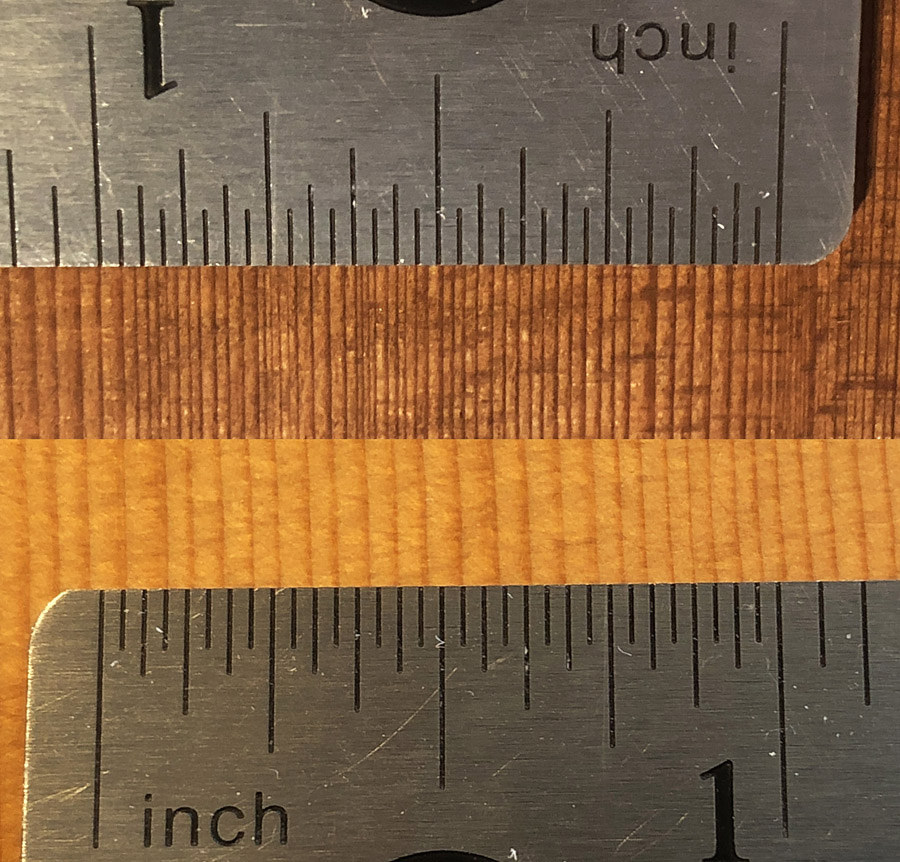
Here is the front panel's ring spacing (53) vs a nice vintage Norman B20 (25 r.p.i.). Pre-war Martins are usually around 40 r.p.i. You can dive into some dendrochronology here without much trouble. I can see both drought and wet years easily.
On to the sides.
I had a feeling the old, old grape stake wood would not be easy to bend, and I was right. I still gave it a shot, snapped several pieces, burned myself on the bending iron, made some scorch marks, wasted some wood.
So, the sides -weren't- going to be steam bent grape stake wood. Damn. I really wanted to make the entire box from stake wood... I'd already made the parlor sized guitar body mold.
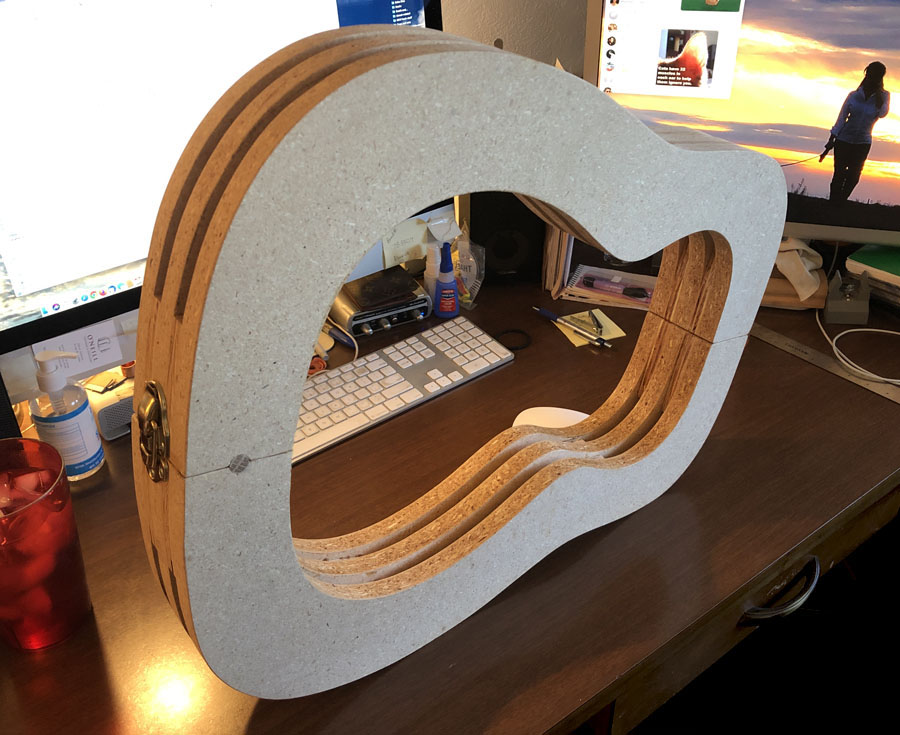
I kicked around in the shop for a while, watered the garden, noticed some wine barrel planters. Staves!
Snare drums rims are often built with stave sides. Why not? Not wanting to reinvent the wheel, I decided to dive into Google and see who else had built guitar sides this way. That turned out to be a fruitless search. I found some lutes and baroque guitars that had multi piece sides and backs, but no stave sides. Really? That surprised me. Seems like a legitimate option for extremely stiff sides, something I've read, repeatedly, as being highly desirable. Hmm.
Since it was my only option, I went with it. I used the mold as the form to glue up the staves. I covered the inside of the mold with a smooth layer of packing tape so the sides would release easily. For the staves, I chopped up some leftover slices, started the pot of hot hide glue simmering.
Hot hide glue was the way to go. It gels and tacks up very quickly, 10 -15 seconds, and, it dries clear and hard. I hand bevelled each stave with a couple swipes on a sheet of sandpaper. The bonus to this method was doing everything inside at the desk.
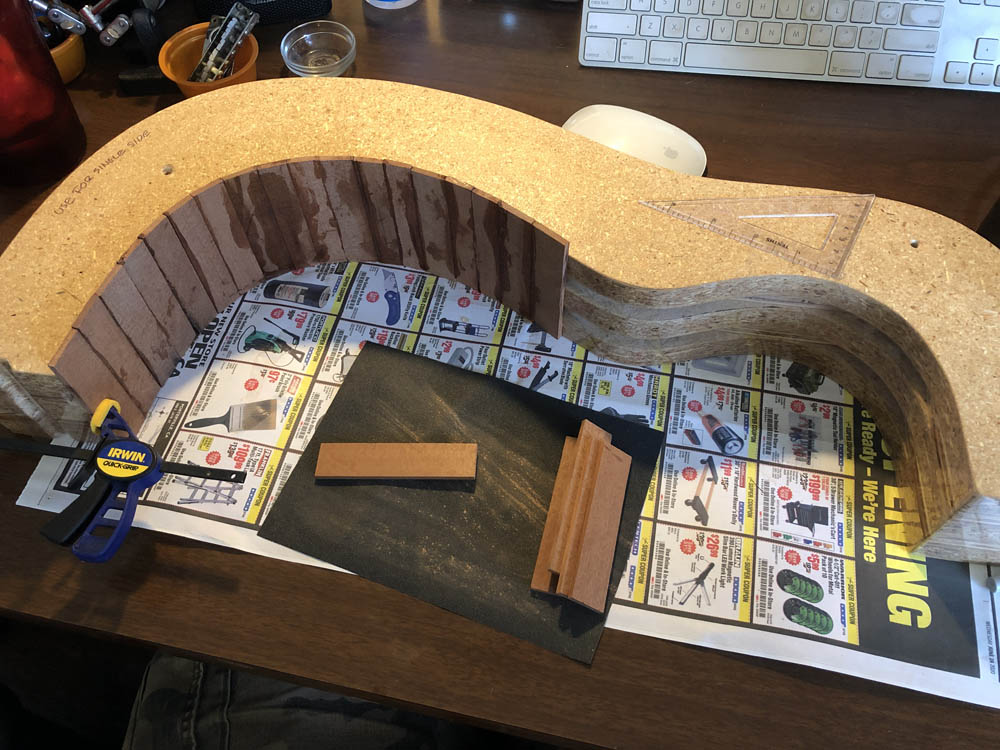
Bevel added.
All done. Ready to sand the edges.
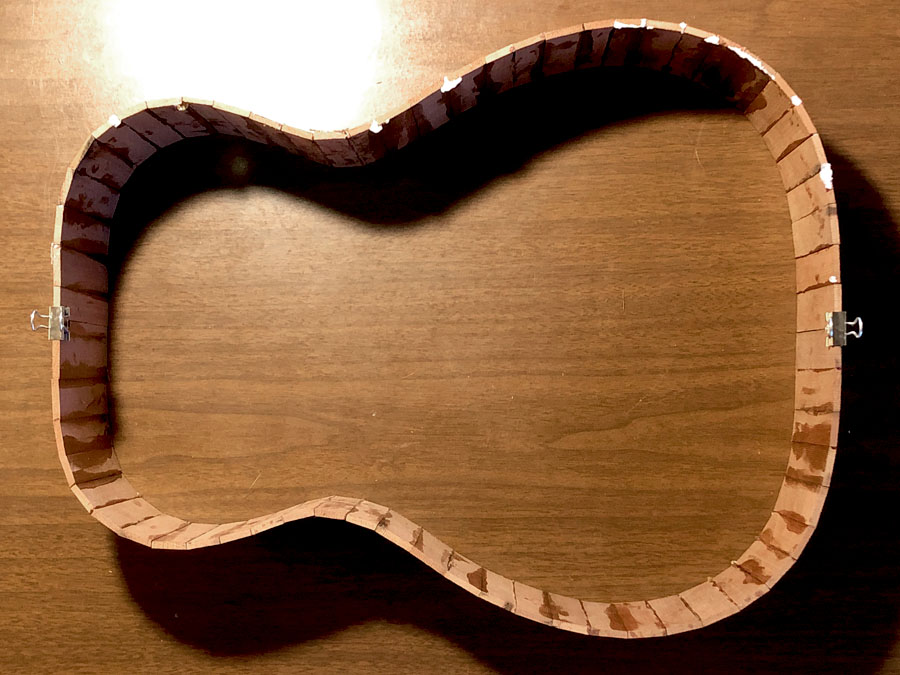
The fun part. Sanding the sides level on top and with a slight decrease in thickness toward the neck on the back. This is where the stave sides became troublesome. I built what is essentially a giant 24" diameter horizontal disk sander using a couple disks of MDF and covered the disks with sheets of 120 grit paper. It is based on an electric clay throwing wheel, so the rotational speed is controlled by a foot pedal. This worked great, right up until one of the sheets curled up on the edge and grabbed the sides. KA-POW! The side assembly exploded into 7 or 8 separate pieces.
This was a learning moment.
I learned that I should just order a couple 24" PSA sanding disks from Grainger. I got 120 and 80 grit disks, and stuck one to each side of the MDF disk. No seam!. Also, all the breaks were through the staves, none of the glue joints failed. They were also very clean breaks. I gathered the pieces up and re-glued them with CA. The joints were invisible.
The large, single disk worked great, and sanded the desired profile into the back, and perfectly leveled the front.
Here is a shot of the finished sides on top of the rough cut top and back. Yes, those are oversized front and back blocks. I'd sanded some of the peaks off the stave joints here. Next time, I'll wait.
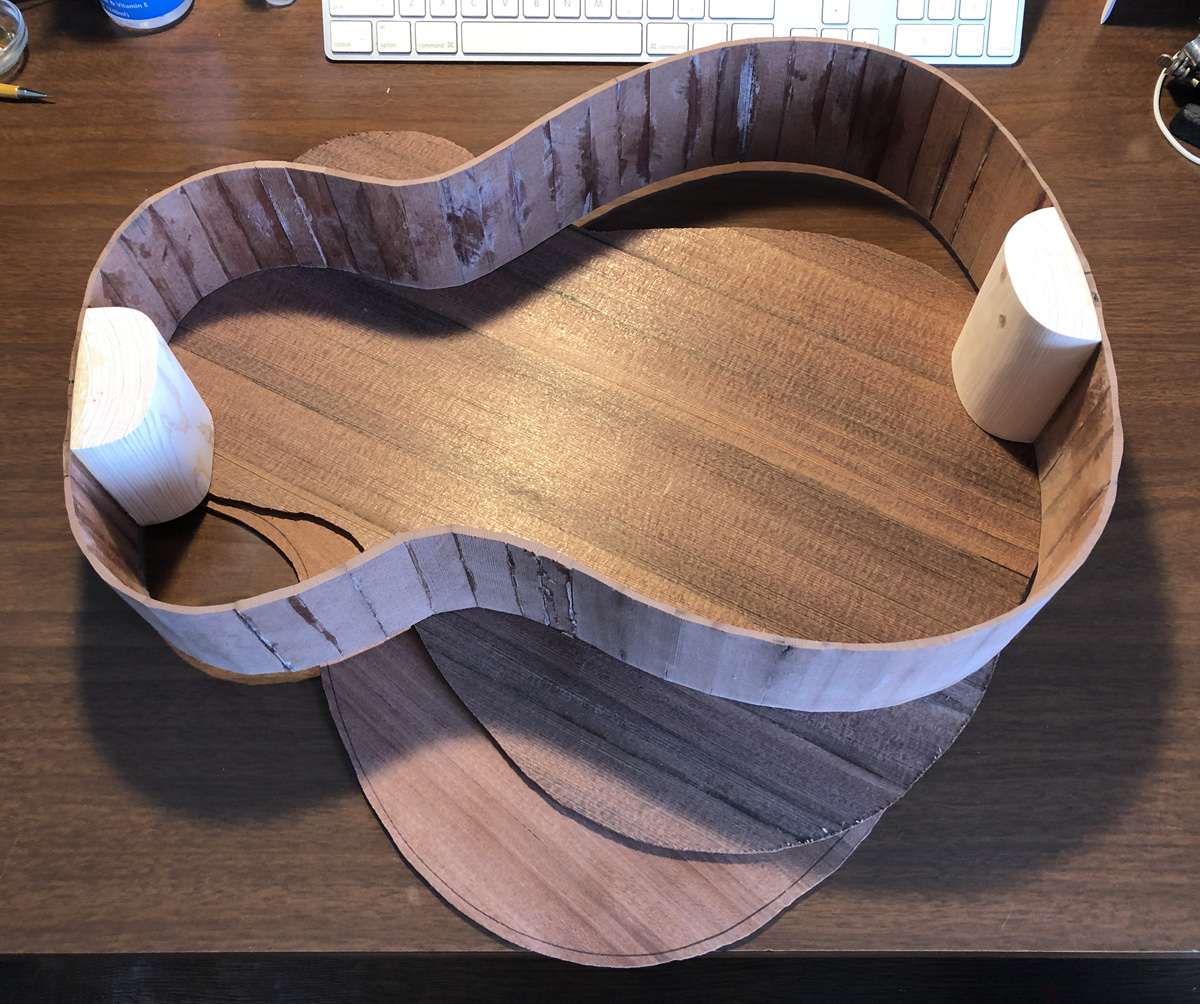
The sides, at this point, were still quite fragile. So I got to work on some linings.
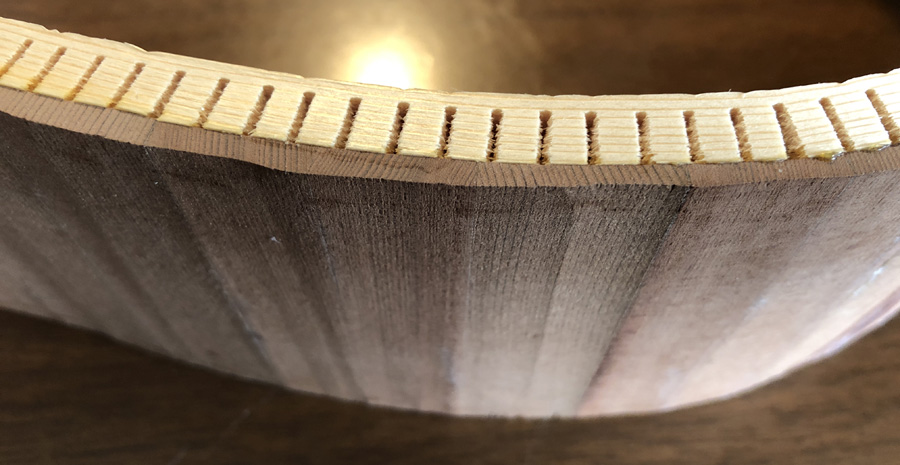
I decided to use kerfed linings made from spruce. Cutting kerfs manually sucks. Getting consistent spacing is dicey, at best. So I built a little jig out of scrap, rubber bands and a spring to do the hard part.
Click for video clip of the jig working
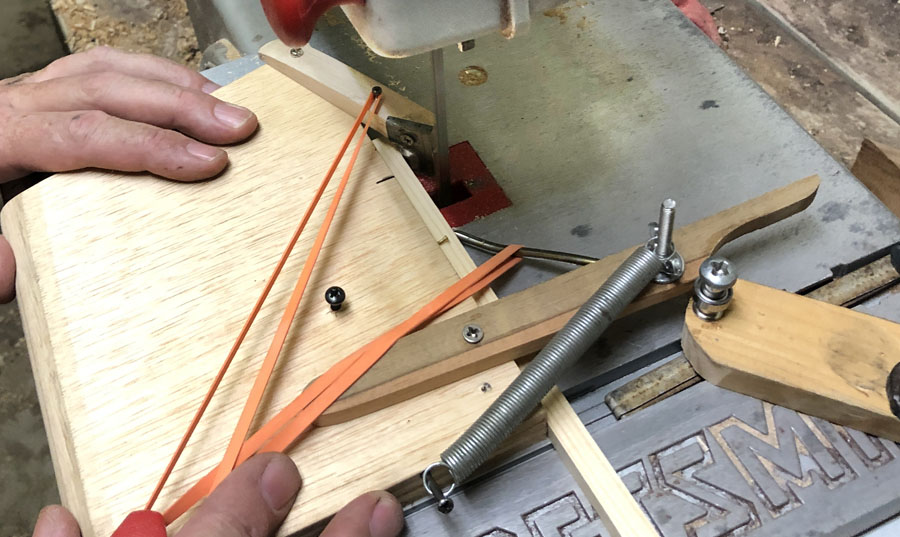
Fast and even. I cut about 20 feet of kerfed linings in 15 minutes with the jig on the tiny band saw.
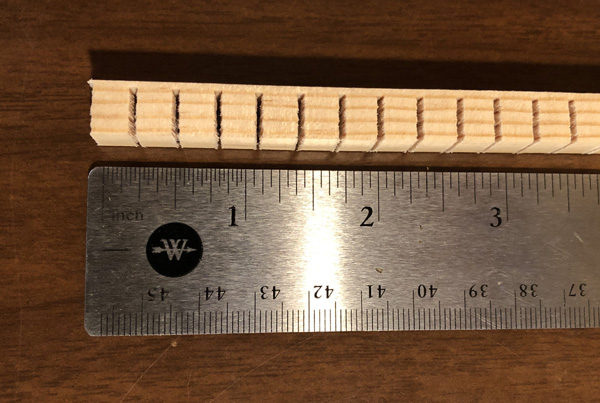
Once the linings were glued in, the sides really stiffened up and could be handled without fear. The final sanding was stress free.
I chose to use Martin style x-bracing. I put a coffee table on the desk to act as a go-bar fixture. Turns out those little bent sticks have a load of lifting force. I piled on a few cases of wine, and limited the number of sticks. I built a -real- fixture afterwards, but the bracing came out great. I made a manual circle cutter out of a dowel, steel brad, and broken exacto blade. Non adjustable, but when I build a guitar with a standard sized sound hole, I'll just knock out another. I cut from the front, halfway. Flipped it over cut the rest of the way, so the edges were very clean. I didn't reinforce the soundhole.
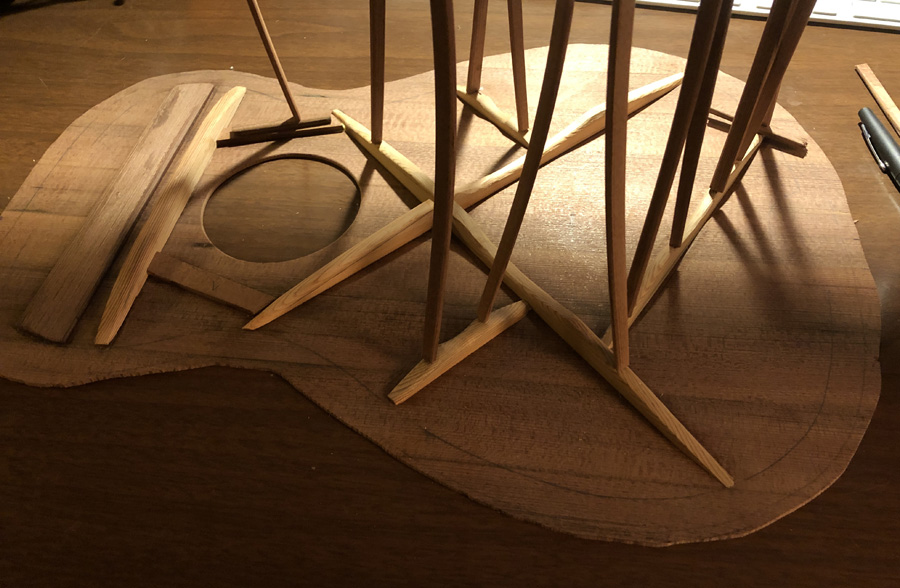
The bracing is more slices of grape stake, except for the bridge plate, which is maple. Next time, I'm adding another short brace between the bass side X and the waist. It needs two there. I used titebond II on the braces, but I soaked a piece of linen in hot hide glue and locked the X brace together. At this point, I wasn't sure if I was going to use a traditional pinned bridge or something more along the lines of the old Harmony/Kay wrap-around bridges.
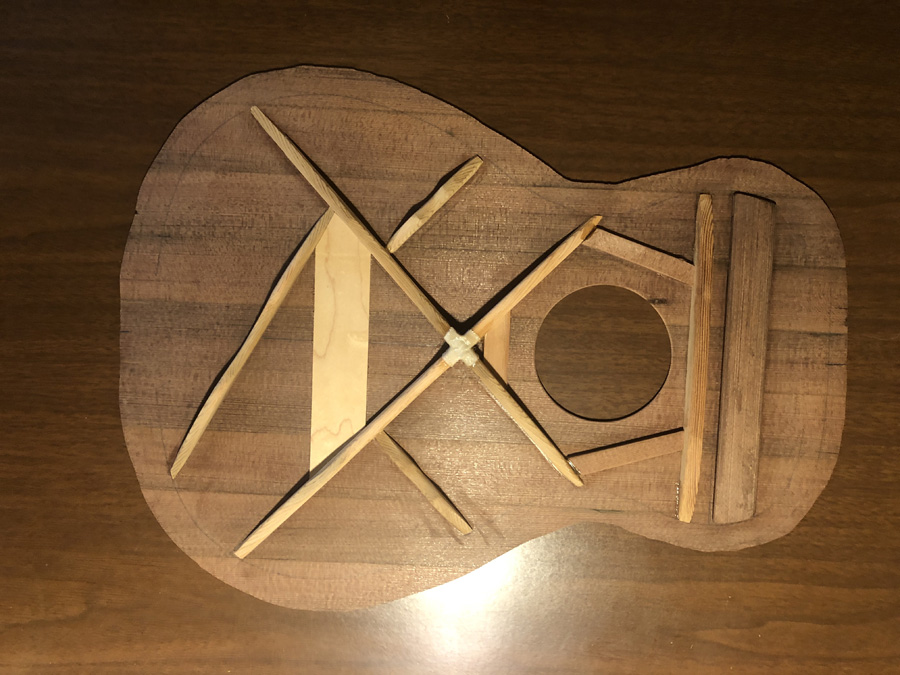
The back has traditional ladder bracing. Here, the back is already glued on. The neck block is thick because it's getting a mortise cut into it. The heel block is thick because I was lazy, and justified the extra as critical area soundboard support. You can't really see it, but the waist brace, the only one visible through the sound hole, is crooked. Not sure how I managed that one.
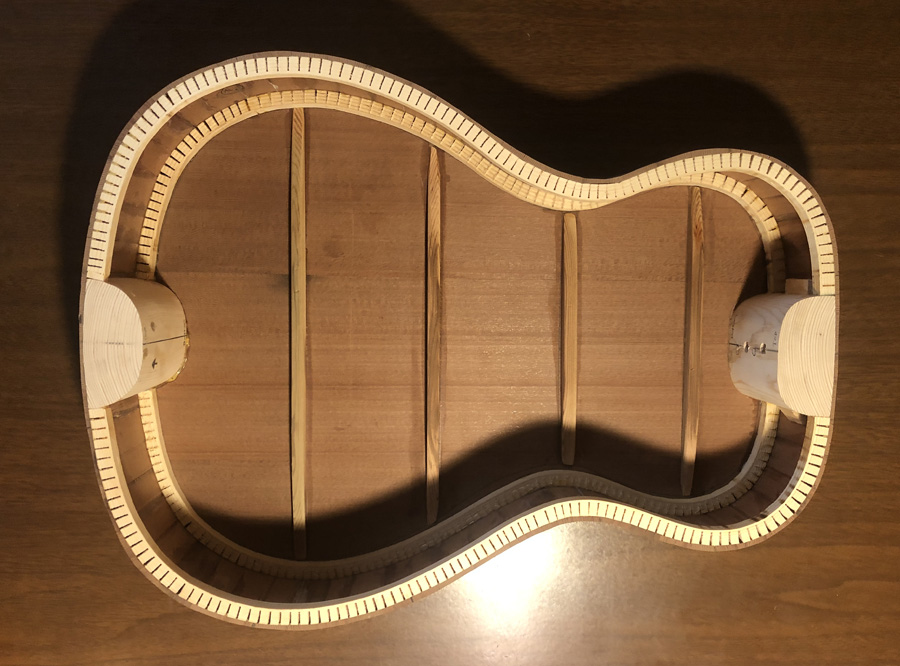
Finally got to use some of the 50 spool clamps I made.
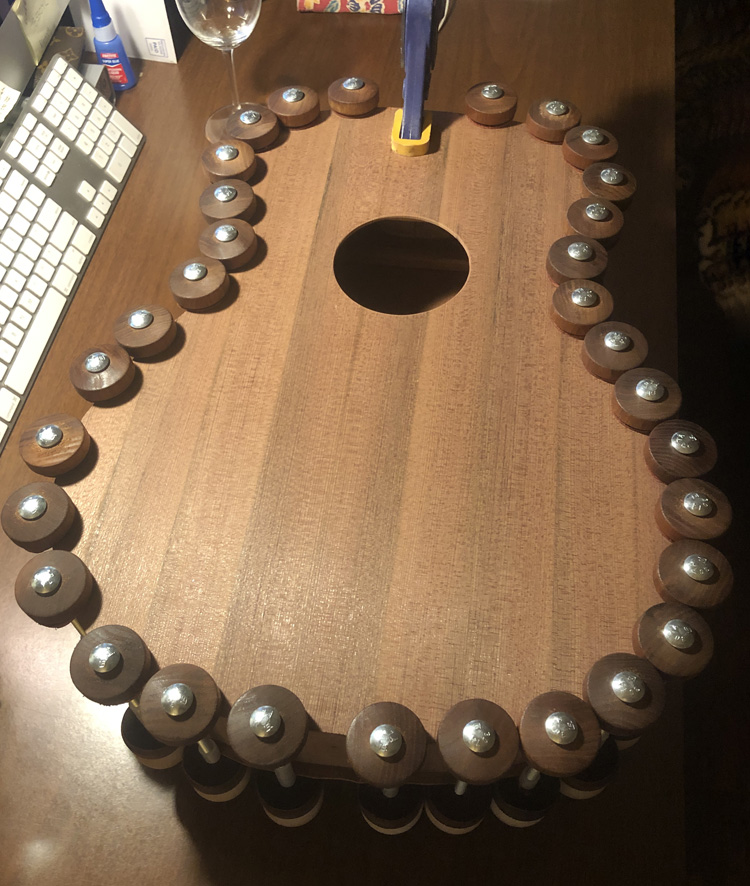
Once the glue was dry, Titebond again, I trimmed the overhanging top and back, and sanded the sides fair. There is still some faceting visible, but I'd originally cut the staves on the thin side, so good enough was perfect.
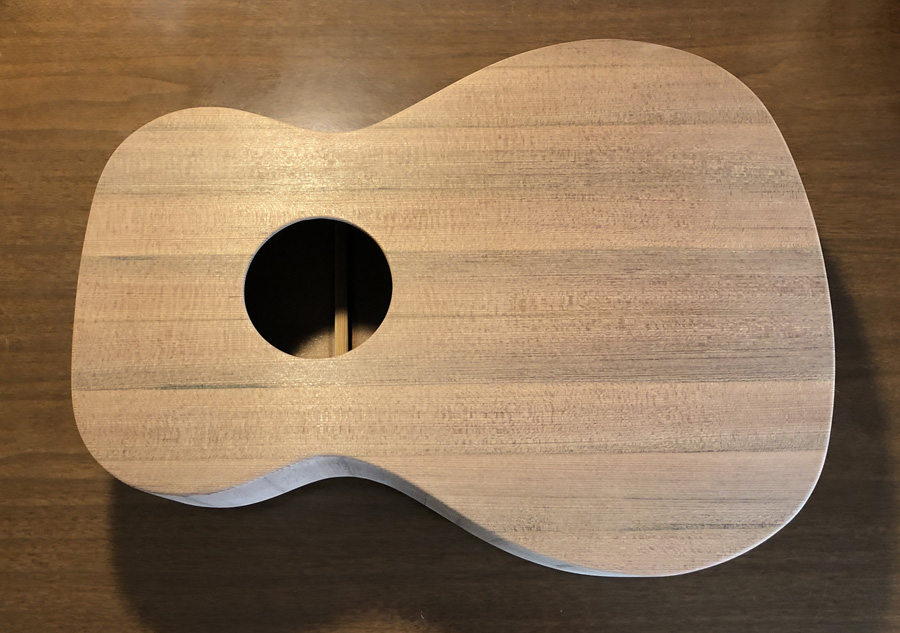
Once trimmed and sanded, I lightly scraped the top one last time and wiped on a thin coat of platina shellac (de-waxed, of course).
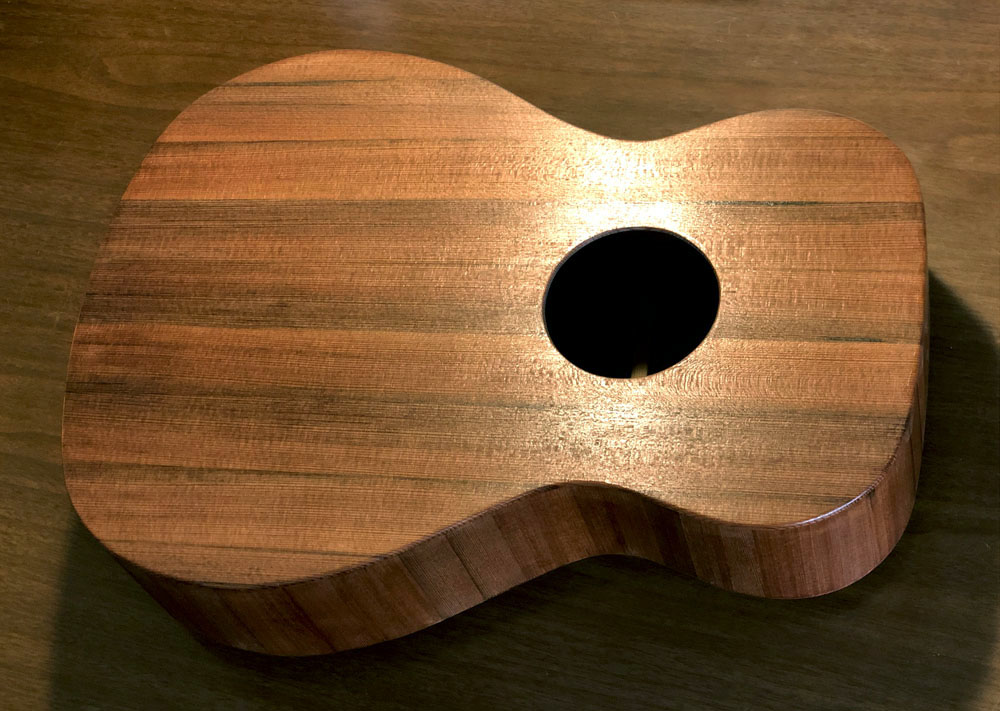
...and hung it up to be safe from fingers and cats while I built the neck.
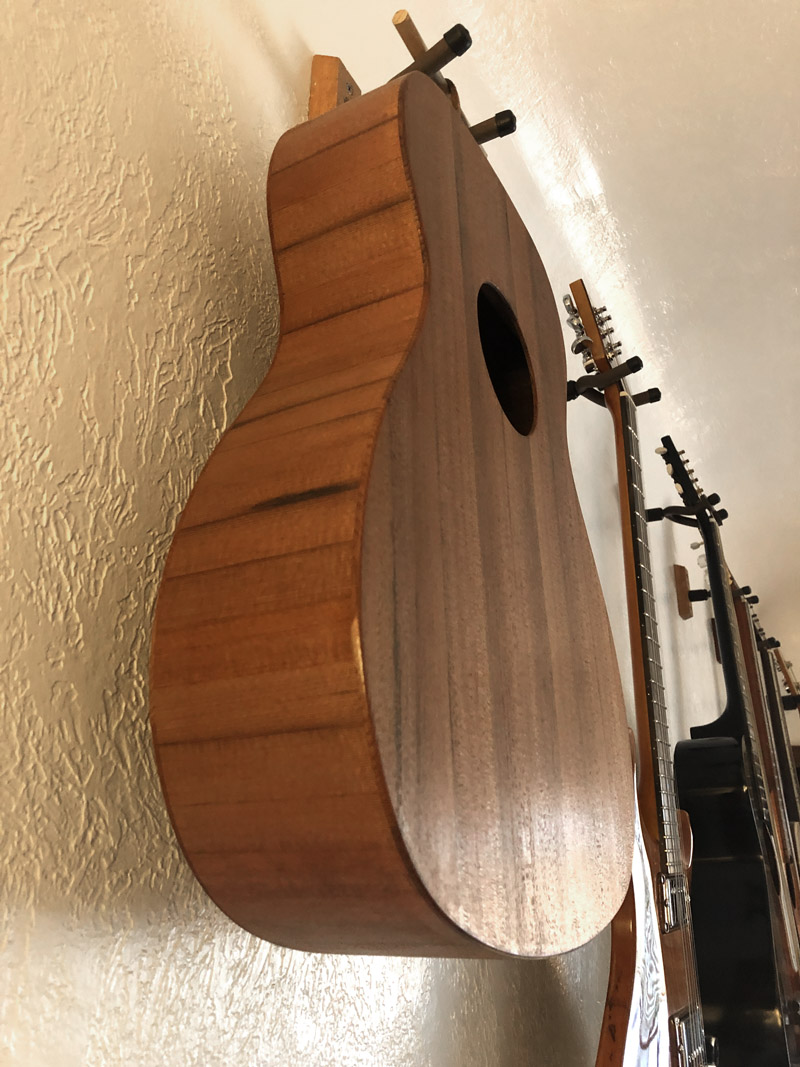
For the neck, I also wanted to use grape stake wood. Spanish guitars sometimes have Spanish cedar necks (though that is closer to mahogany than cedar). This grape stake wood is very hard and dry, so I grabbed a stake, glued up a blank and cut it out. If it fails, so be it. That's the purpose of a test build.

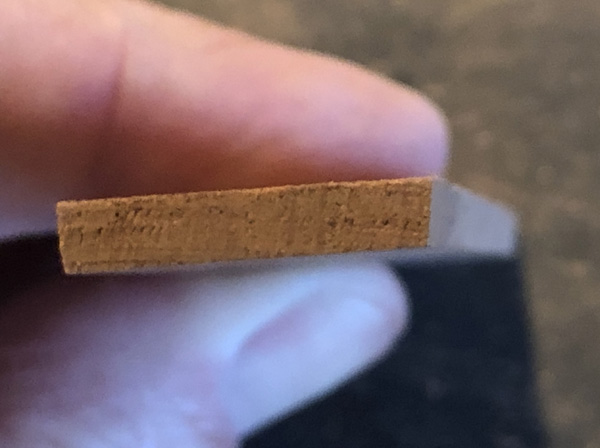
This wood, once cut, was light pink, kinda goofy looking. Probably sapwood. So I set it aside and glued up another blank. On neck #2, I wasn't paying as close attention and glued the heel stack to the wrong side of the blank. So, the grain direction is wrong. It -looks- nice, with some of the dark streaks, but since I was worried about neck integrity, not optimal. However, this whole thing is sort of a strength test, so used it. Raw cut blank comparison below.
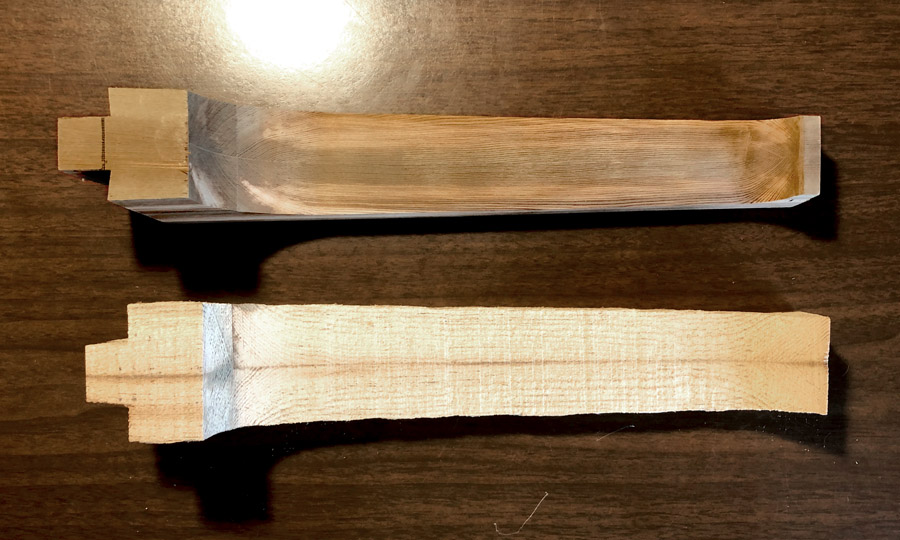
The streaked neck came out nice, really popping under the shellac. I cut the scarfed-on headstock thin, no overlay. Sanded to shape, raw, and with one wipe of shellac. I finished the tenon and set the tiltback to about 2 degrees. The heel is extra thick as it has two one inch long 1/4-20 inserts secured inside oak dowel reinforcements. Neck will be thinner, heel will be smaller on the next one.
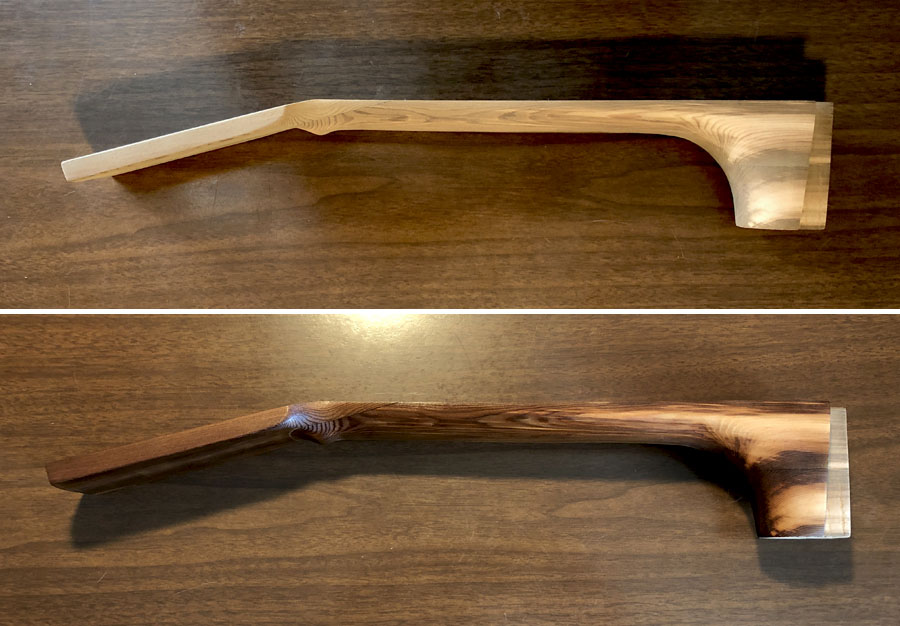
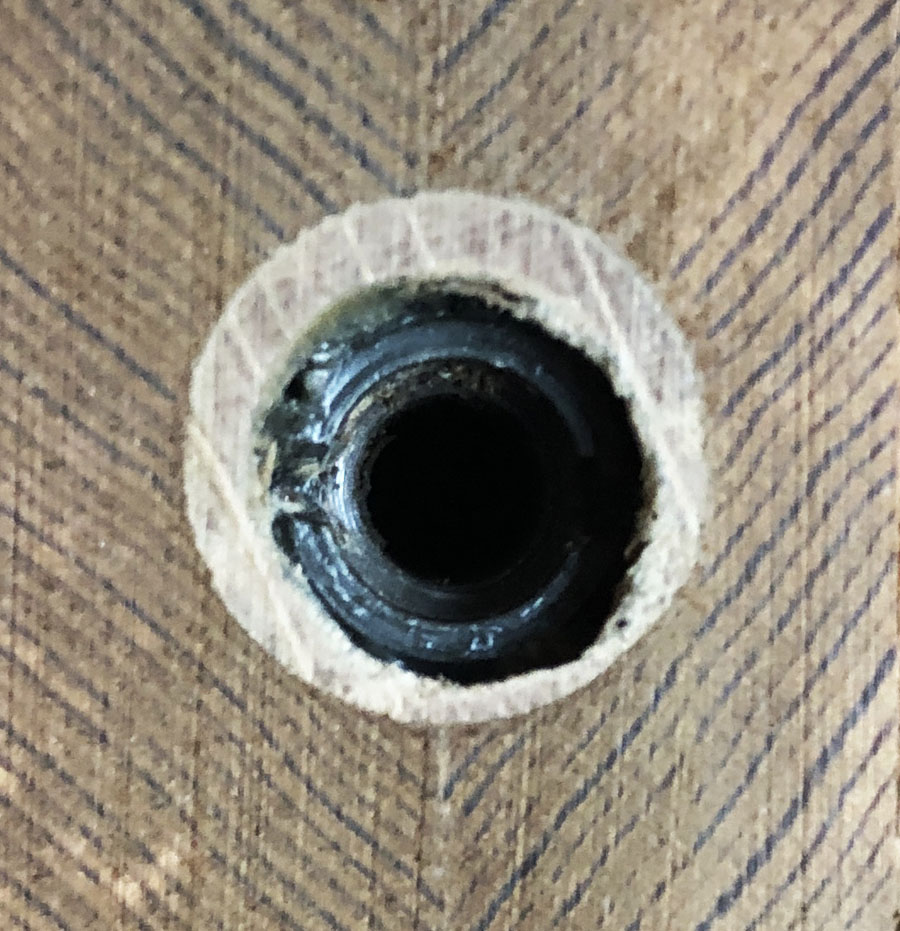
One insert installed, each neck gets two. I use EZ-lok inserts for soft metals. They work excellent with the tapped oak dowel shells.
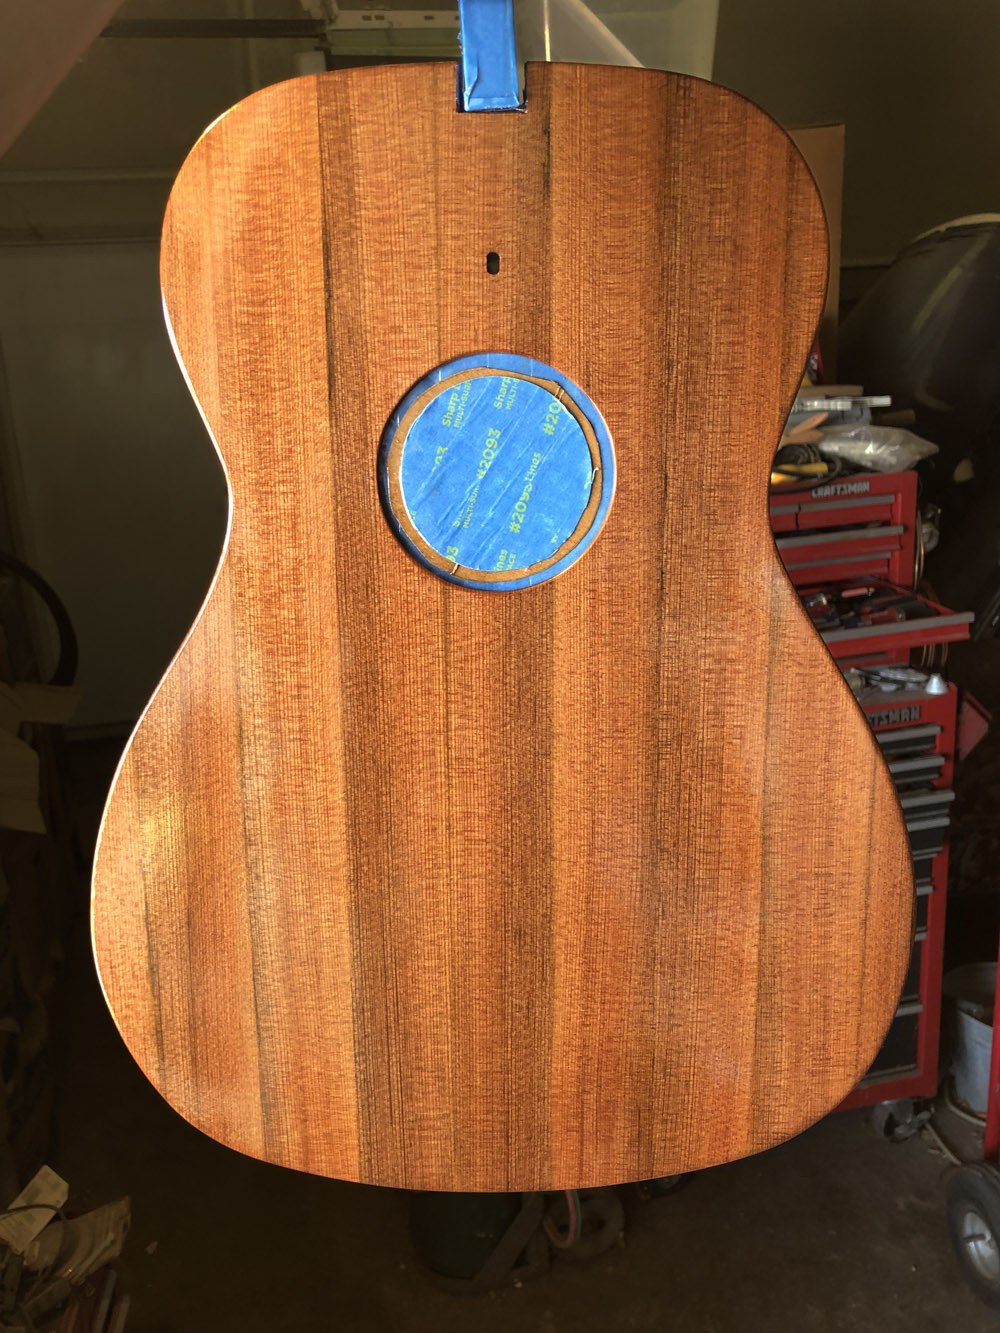
Then I cut the mortise in the body, and drilled a slot for the extension hold-down bolt. I mounted the body on a temporary handle and shot several coats of lacquer. Simple, no binding, no rosette, slight round over. During the lacquer, I started thinking about a bigger roundover... On an acoustic, it might be interesting looking.
At the 17th fret dot, I drilled through the fretboard (a piece of walnut) and epoxied in a slotted 6-32 machine screw. Then I put the dot over the top. This stud fits into the slot in the soundboard and secures the extension without glue.
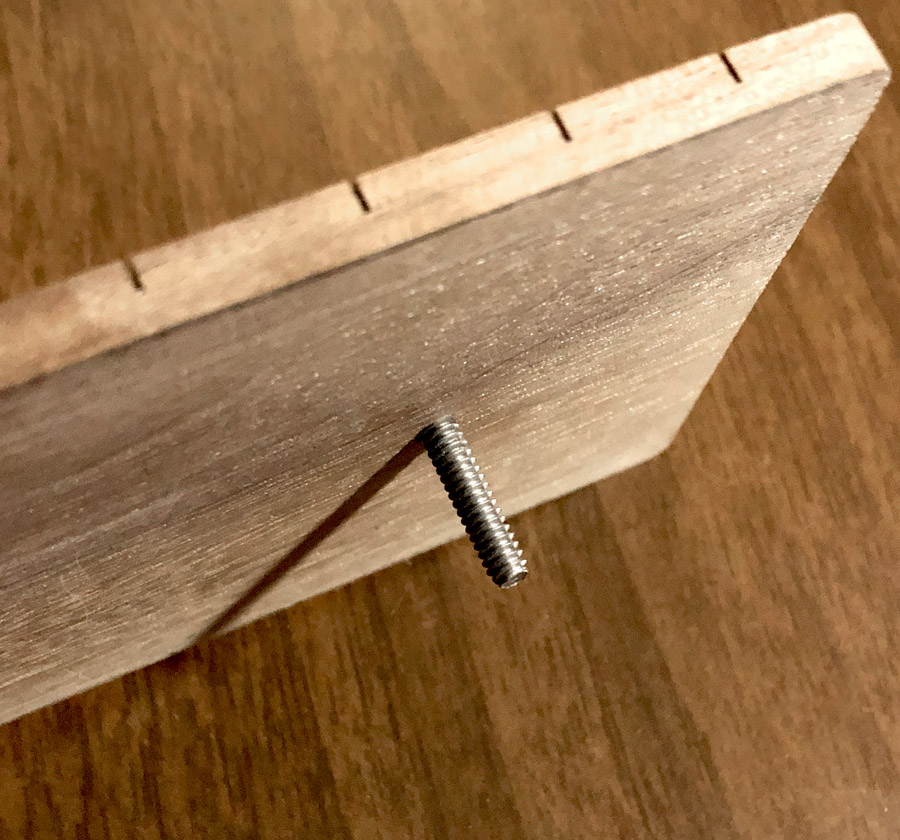
Neck test fit. Looks good! There was the typical heel fitting routine. Tedious pulling of snadpaper strips to mate the neck to the body...
The fingerboard is ebonized (with iron acetate) walnut. It just needs frets
here. I may install the frets before I glue on the fretboard next time. Pressing frets into the loose neck was not fun, and the softer neck wood needed to be sanded out and refinished due to press marks. On the other hand, I managed to get the dots lined up symetrically for a change. I used oversized MOP dots on this one, they go nice with the dark reddish/brown color. I just cut a round relief in the headstock. Eventually I'll need to come up with a "signature" shape.
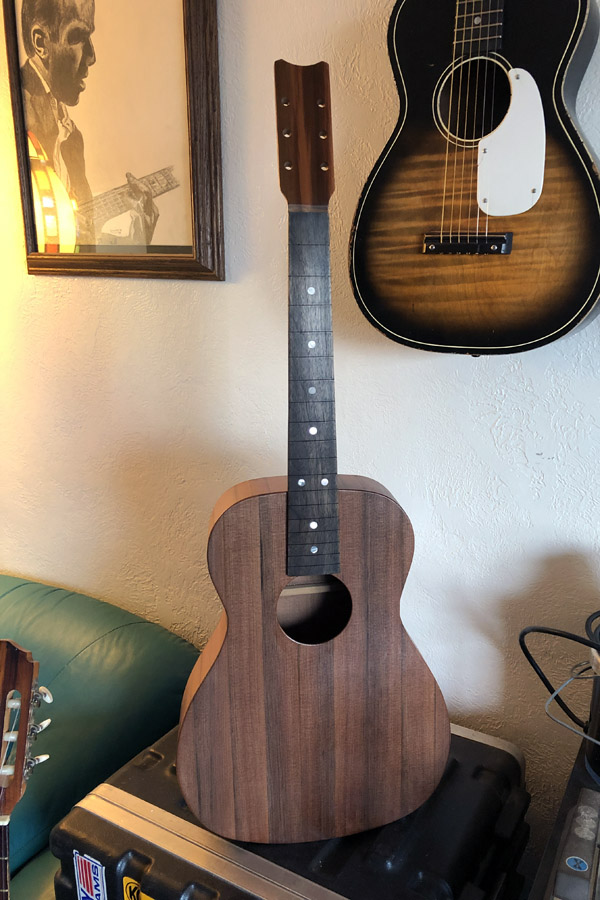
Frets in, strung up, rubbed out, polished. All it needs is a nut and bridge.
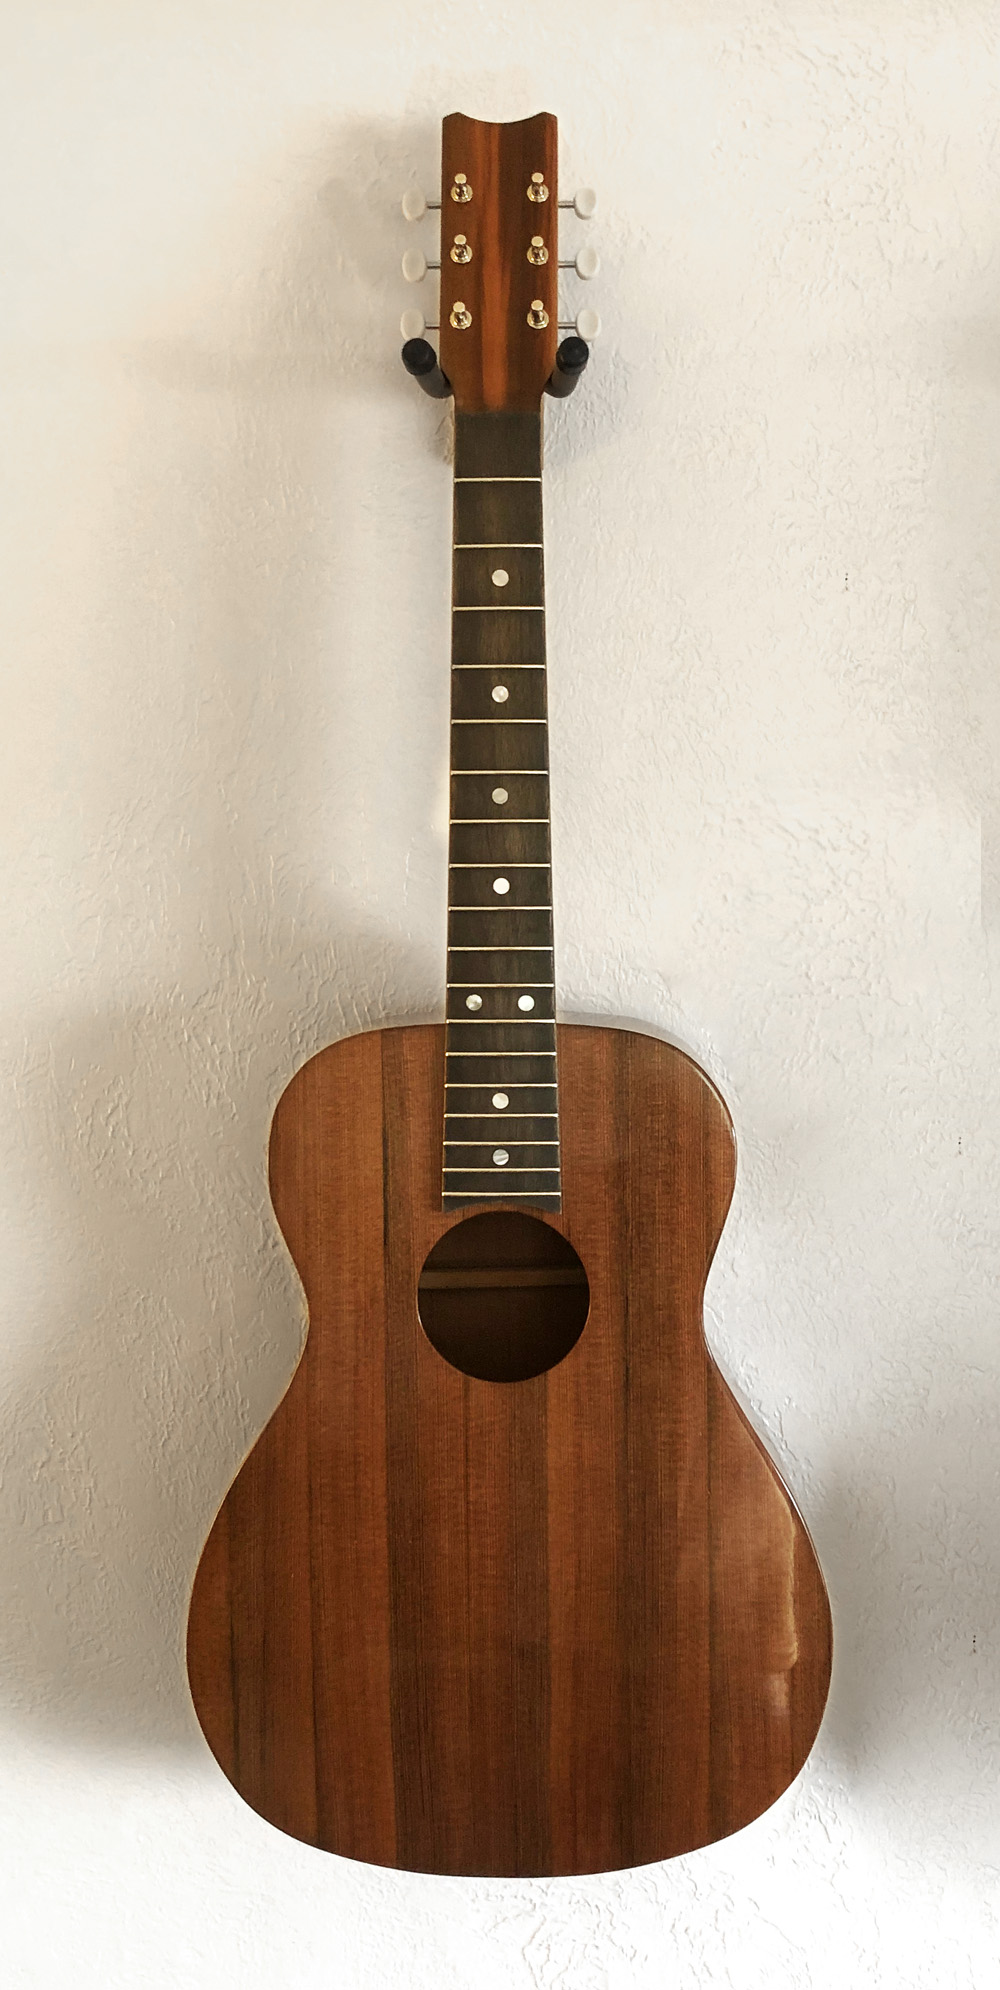
I had a chunk of manzanita that I'd cut into slices years ago. It's a very hard (2350 janka), very fine grained wood. It polishes up really nice, too. I cut a wraparound bridge similar to a 1950's Kay Jumbo. The dots hide two bolts. I wasn't too sure about the bridge design and I wanted to be able to remove it, if needed.
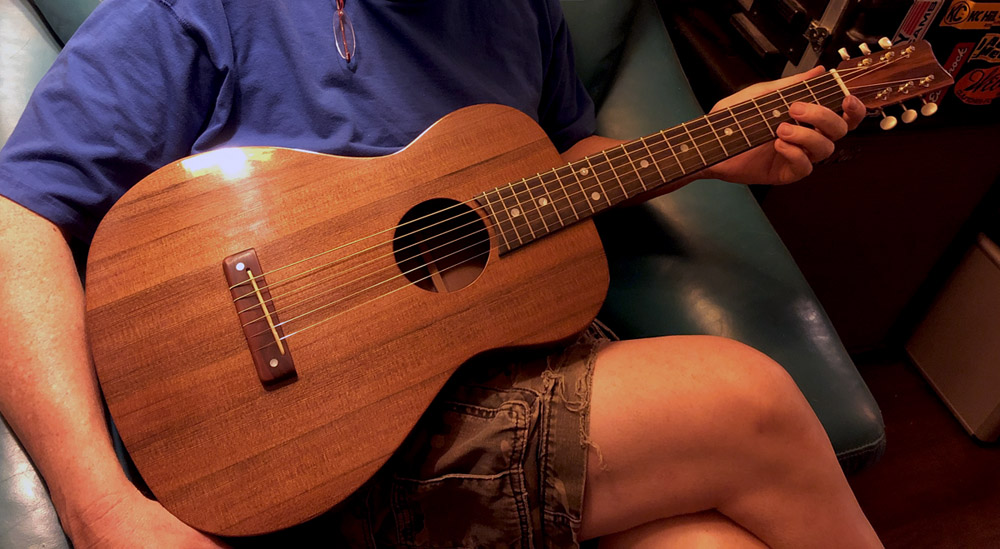
It needed removing. The string break was too shallow, so I cut a relief on the back for a steeper angle. This worked great and I finally glued the bridge down after about a week of playing, as the bolt onlt attachment was just starting to warp the top where the bolts were. Another issue that has popped up is the relative narrowness of the bridge. A wider bridge will spread the string pull stresses over a wider area, and thin tapered ends will flex a bit, instead of the blockyness of this bridge which creates stressed areas right at the edges of the bridge.
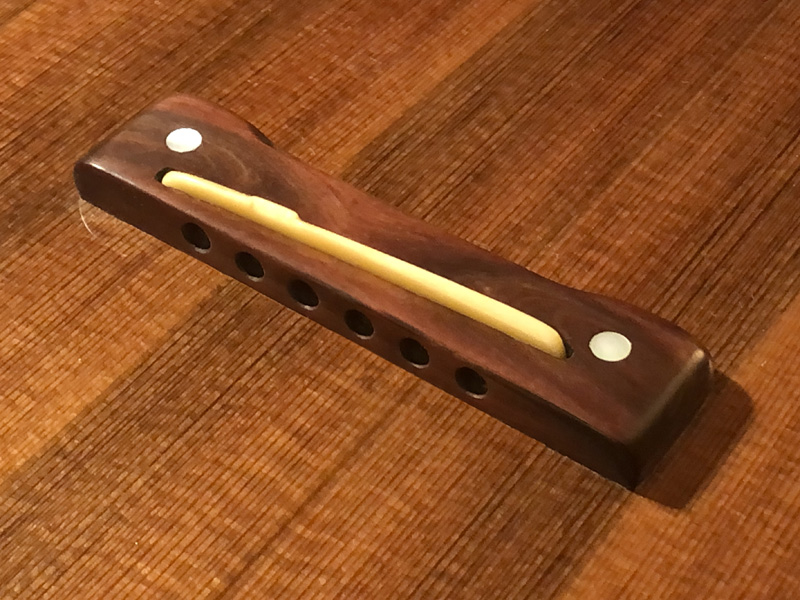
I stuck a label inside to distract from the wonky brace. Bridge is glued on here. Manzanita is nice. As hard as rosewood without the grain pockets. It it just sanded to 1200 here, oiled, and hand buffed.
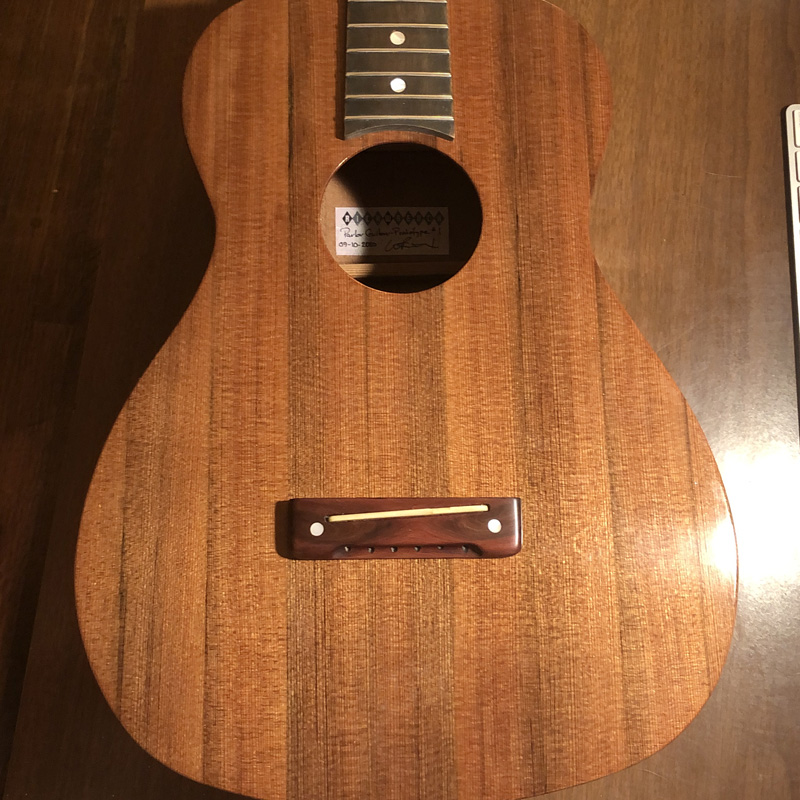
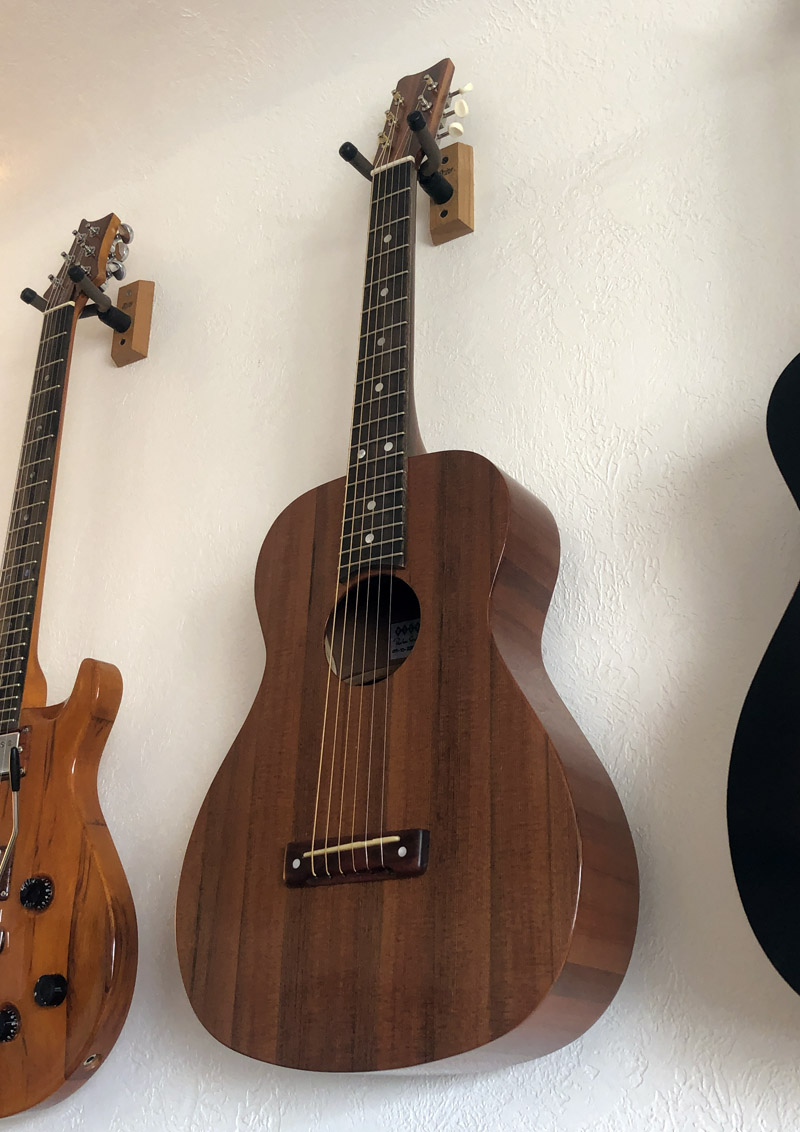
All done. My plan was to try and play this one to death. Sort of a destruction test. So far, it has held up perfectly, and I've been treating it better. It SOUNDS great. I've played it off against several top shelf guitars. A couple Martins, a Larrivee, two Taylors, my old Norman...
It easily holds up to all of them. Probably somewhere between the Martin and Larrivee. The old, aged wood hasn't needed any "playing in". It sounds 50 years old right now. Played against a vintage Silvertone 604, the difference is ridiculous.
I'll play this one hard for another couple months, then?
I've already had some interest in a few more of these.